You have a lab practical tomorrow. Your safety quiz is in two hours. You have read the same list of rules so many times that the words blur together. Goggles. No eating. Tie back hair. You know the drill. Or do you?
Every year, chemistry students walk into a lab and make small mistakes that have big consequences. A splash of acid. A forgotten fume hood. A beaker of acetone left uncapped near a Bunsen burner. These incidents rarely make the news, but they happen often enough that safety officers have a name for the pattern. They call it the “familiarity trap.” You think you know the rules, so you stop seeing them.
This guide covers the seven lab safety rules that chemistry students forget most often. If you are studying for a safety quiz or just want to avoid becoming a cautionary tale, these are the ones worth reviewing.
Most lab accidents happen not because students do not know the rules, but because they assume minor shortcuts are harmless. The seven rules covered here are the ones that experienced chemistry teachers and lab managers see violated most often. Reviewing them now can prevent a burn, a chemical spill, or a trip to the emergency room.
The Goggle Rule Nobody Follows Correctly
You put on safety goggles at the start of lab. Good. But do you keep them on for the entire experiment? Many students remove their goggles during a waiting period or when they think the dangerous part is over. This is a mistake.
Chemical splashes can happen at any stage. You might be pouring a waste solution into a container and get a drop of concentrated acid in your eye. You might be heating a test tube and have it burst. The moment you take off your goggles is the moment you are most vulnerable.
Here is the rule that actually keeps you safe:
- Put on your goggles before you enter the lab workspace.
- Keep them on until you have washed your hands and are ready to leave.
- Do not push them up onto your forehead. This transfers contaminants to your skin and leaves your eyes exposed.
- If you need to wipe sweat or adjust your hair, step away from the bench first.
“I have treated more eye injuries from students who took their goggles off ‘just for a second’ than from any other cause.” — Dr. Maria Flores, university lab safety coordinator
Fume Hoods Are Not Optional Storage Units
A fume hood is not a shelf. It is a ventilation device designed to pull airborne hazards away from your face. Chemistry students often treat it as a convenient place to store bottles or leave a hot plate running. This defeats the purpose.
Use the fume hood whenever you work with volatile solvents, concentrated acids, or any chemical that produces fumes. That includes ammonia, hydrochloric acid, acetone, and many organic compounds. If the label says “use in a well-ventilated area,” the fume hood is the right place.
Common mistakes with fume hoods include:
- Storing chemical bottles in the hood and blocking the airflow
- Raising the sash too high, which reduces suction
- Leaning your head inside the hood to see the reaction
- Using the hood as a catch-all for dirty glassware
The sash should be kept as low as possible. Most labs require the sash to be at or below the marked line. If you cannot see the sash line, ask your instructor to show you.
The One Chemical You Should Never Smell
Your high school chemistry teacher probably told you to waft fumes toward your nose instead of sniffing directly. That is good advice. But there is a deeper rule that many students forget: never smell a chemical that you have not identified.
A student in a 2024 lab accident thought he was smelling dilute acetic acid. He was actually smelling a bottle of glacial acetic acid that had been mislabeled. The result was a burned nasal passage and a trip to urgent care.
The proper way to identify an unknown chemical by smell (when the lab procedure requires it) follows these steps:
- Hold the container at arm’s length.
- Use your hand to waft air from the opening toward your nose.
- Take one small sniff.
- If you smell nothing, do not move closer. Stop.
If a chemical has no odor but the procedure says it should, check the label again. Do not assume.
Waste Disposal Rules That Change Everything
Pouring chemicals down the drain is almost never allowed. But many students do it anyway, especially when they are in a hurry to clean up and leave. The problem is that some chemicals react with plumbing, some corrode pipes, and some harm the environment.
Here is a table that shows common disposal mistakes and the correct method:
| Chemical Type | Common Mistake | Correct Disposal |
|---|---|---|
| Heavy metal solutions (copper, lead, chromium) | Pour down the sink | Collect in labeled waste container |
| Organic solvents (acetone, ethanol) | Evaporate in the hood | Place in halogenated or non-halogenated waste |
| Strong acids and bases | Dilute and pour down drain (only allowed for small amounts in some labs) | Neutralize first, then follow lab protocol |
| Solid reagents | Throw in trash can | Check for hazardous classification first |
| Silver compounds | Pour down sink | Collect for recovery or hazardous waste |
If you are ever unsure, ask your instructor. Do not guess. A single mistake can contaminate an entire waste stream and cost the school thousands of dollars in cleanup fees.
Why You Should Never Use a Phone in the Lab
This rule sounds like a nagging parent, but it has a real basis. Phones are contaminated. You touch your phone between steps, then you touch your equipment. You also get distracted.
A student at a university in Ohio dropped a beaker of sulfuric acid because she was reading a text message. The acid splashed onto her lab coat and the floor. She was not injured, but the cleanup took forty-five minutes and required a hazmat team.
If you need to look up a procedure, print it out beforehand. If you need to take a photo of your results, use a lab-only device or ask your instructor. Keep your phone in your bag, away from the bench.
The Emergency Response Sequence You Have Never Practiced
Most students can recite the location of the eyewash station and the fire extinguisher. But they have never actually practiced using them. When an emergency happens, muscle memory matters more than memory.
Here is the sequence you should know for a chemical splash in the eye:
- Call for help immediately. Do not try to handle it alone.
- Get to the eyewash station within ten seconds.
- Hold your eyes open with your fingers.
- Flush for at least fifteen minutes.
- Remove contact lenses if you wear them. They can trap chemicals against your eye.
- Seek medical attention even if the pain stops.
For a small fire on the lab bench:
- Turn off any heat source.
- Smother the fire with a watch glass or beaker if it is small.
- Use the fire extinguisher only if the fire is larger than a coffee cup.
- Evacuate if the fire spreads.
For a chemical spill on your skin:
- Remove contaminated clothing immediately.
- Flush the area with water for at least fifteen minutes.
- Use the safety shower if the spill covers a large area.
- Do not apply ointments or creams. Let medical staff handle treatment.
The Rule About Eating and Drinking That Everyone Breaks
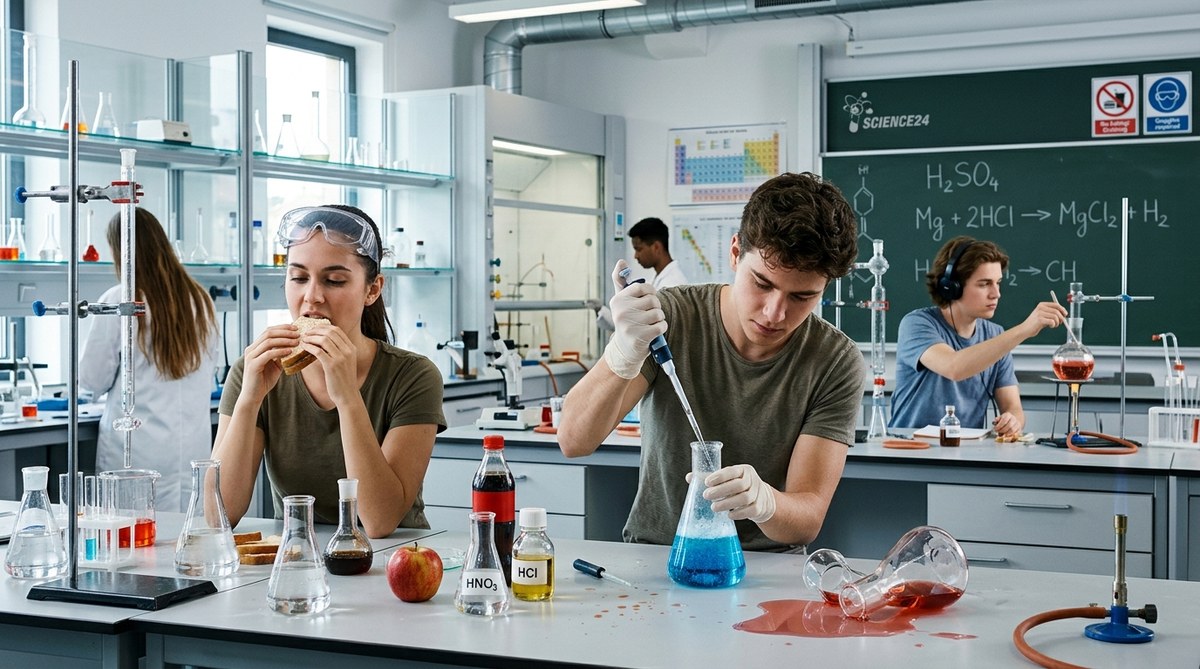
You know you are not supposed to eat or drink in the lab. But have you ever taken a sip of water from a bottle you brought to the bench? Have you ever chewed gum during a long titration?
These small violations are dangerous for two reasons. First, your hands may have trace chemicals on them even after washing. Second, food and drink containers can look like lab containers. A student at a California community college drank from a beaker that he thought contained water. It contained a dilute sodium hydroxide solution. He suffered burns to his mouth and throat.
The rule is simple. Do not bring any food or drink into the lab. That includes coffee, water bottles, gum, mints, and lip balm. If you need to hydrate, step outside the lab completely, wash your hands, and then drink.
Putting Safety Habits Into Practice
Lab safety is not about memorizing a list and checking it off. It is about building habits that become automatic. When you walk into the lab, your brain should already be running through a mental checklist.
Here is a short list of actions you can take before your next lab session:
- Review the safety data sheet for every chemical you will use
- Locate the eyewash station, safety shower, and fire extinguisher
- Check that your goggles fit snugly and have no scratches that block vision
- Tie back long hair and remove dangling jewelry
- Wear closed-toe shoes and long pants
- Know where the nearest exit is
If you want to go deeper into the chemistry behind the hazards, check out our guide on what happens during an exothermic reaction. Understanding the energy changes involved can help you predict when a reaction might get dangerous.
Making Safety Your Default Mode
The best lab safety rule is the one you follow without thinking. When you walk into a lab and automatically reach for your goggles, when you check the label before pouring, when you step back from a reaction that seems unstable, those habits keep you safe.
Chemistry is an amazing subject. It explains why ice floats, how batteries work, and what makes a fire burn. But none of that matters if you get hurt. Treat every lab session with the same respect you would give to driving a car on a busy highway. The rules are there for a reason.
Next time you are in lab, take an extra thirty seconds to double-check your setup. Look at your neighbor’s bench. If you see something unsafe, say something. A good lab partner speaks up. A great lab partner prevents the accident before it happens.
You have the knowledge. Now build the habits. Your future self will thank you.